

About FacilPay
FacilPay is an AI-enhanced, message-centric payment platform that integrates with user-intent blockchain technology. It offers secure peer-to-peer messaging and global payments at your fingertips. Whether dealing with crypto or fiat, sending and receiving money is now as easy as sending or receiving a text message on your FacilPay app. These payments can be done from one web3 wallet to another in the form of coins and tokens or from web3 wallets to fiat in the form of conversions from crypto to receivers’ local currencies. Also, FacilPay offers an assortment of both typical and new features popular in the blockchain sphere such as crypto bridging, crypto swapping, P2P protocols, multichain infrastructures, and more.
Key Benefits
- Simple for beginners — works like a standard chat app.
- Multi-chain support — one wallet for multiple blockchains.
- All-in-one — wallet, swaps, NFTs, and chat in one place.
- Crypto to fiat — convert tokens into local currency.
- Chat + Pay — ideal for friends and small businesses.
- Massive market — messaging, payments, and crypto combined.
Unique Features
- Send money like sending a text.
- Multi-chain wallet with self-custody.
- Built-in swap and bridge.
- Crypto-to-fiat conversion.
- AI assistance for simple commands.
- Web2-like interface powered by Web3.
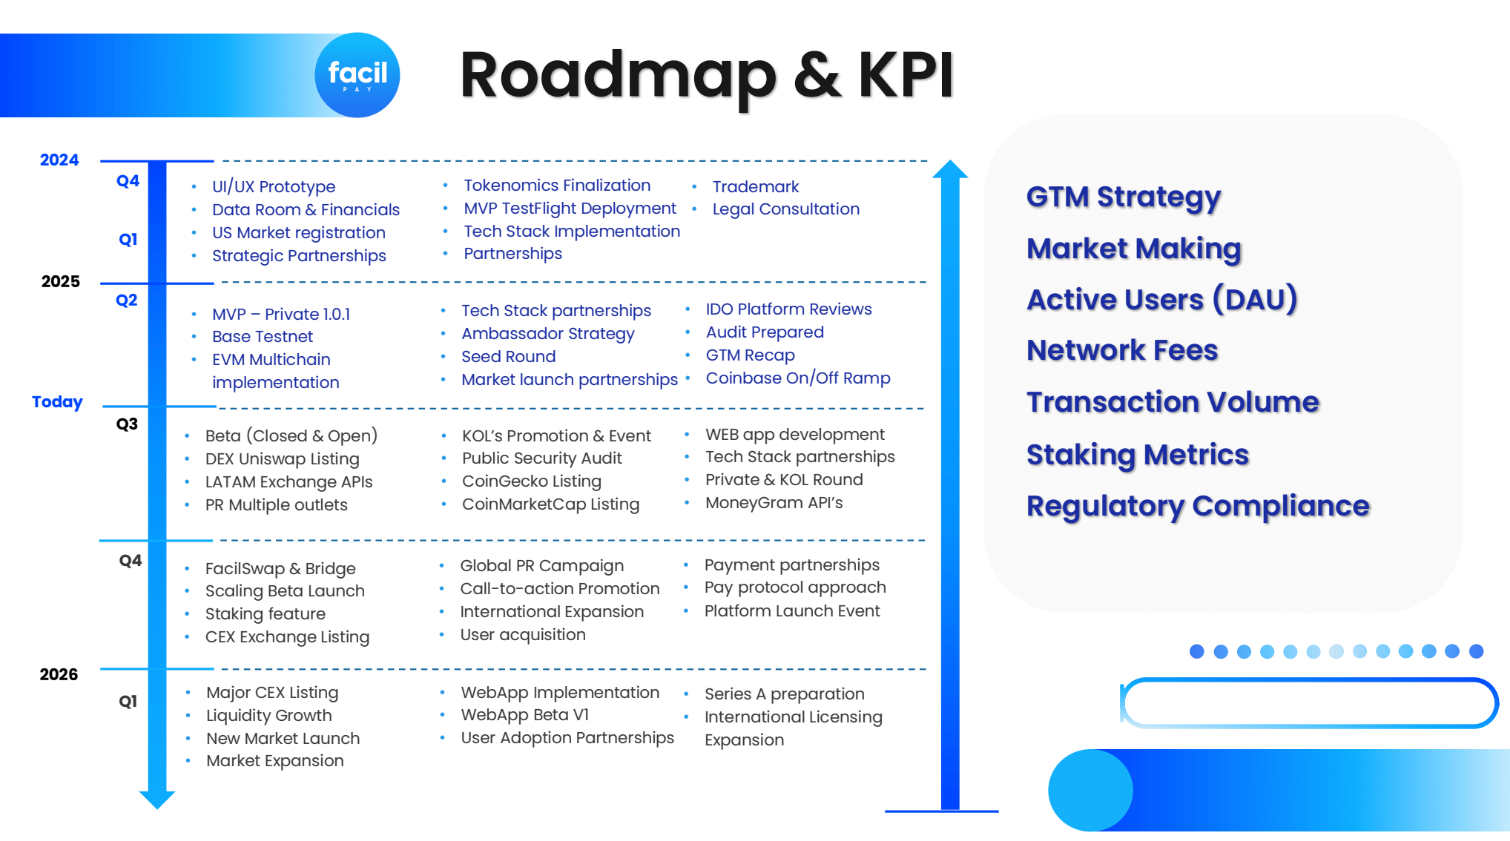
Roadmap
Team & Funding
Backed by Andromeda Capital, but fundraising details remain private.
Founder: Dean Kim, 20+ years in finance, tech, and blockchain.

How to Participate in a Spores Network IDO
Step 1: Connect & Stake $SPO
- Go to the Spores Launchpad site and connect your wallet (e.g. MetaMask).
- Stake the required amount of $SPO tokens to reach a VIP tier.
- Each VIP tier grants different “pool weight” or allocation advantages.
Step 2: Get Your VIP Tier & Register Early
- Once staking is confirmed, your VIP tier will be assigned.
- Find the IDO project you want to join on the Spores Launchpad.
- Register (or enter the whitelist) at least 10 hours before the sale opens.
Step 3: Receive Allocation Details
- After registration, Spores will send you an email (or notification) with your allocation size and time window to make a purchase.
Step 4: Purchase During the Sale Window
- At the designated time, go back to the Spores Launchpad and click on the project you registered.
- Enter the amount you wish to buy (typically in USDT on BSC or another supported token).
- Approve the transaction via your wallet.
Step 5: Claim & Use Your Tokens
From there, you can hold, stake, trade, or use them in the Spores ecosystem or other platforms.
After the IDO ends, you’ll be able to claim the tokens to your wallet.
Restricted Countries & Territories:
Afghanistan, Angola, Balkans, Belarus, Bosnia and Herzegovina, Bulgaria, Burundi, Cameroon, Central African Republic, Côte d’Ivoire, Cuba, Democratic Republic of the Congo, Democratic People’s Republic of Korea, Eritrea, Ethiopia, Guatemala, Guinea, Guinea-Bissau, Haiti, Iran, Iraq, Lebanon, Liberia, Libya, Mali, Moldova, Montenegro, Myanmar, Nicaragua, Niger, Russia, Rwanda, Sierra Leone, Serbia, Somalia, South Africa, South Sudan, Sudan, Syria, Tunisia, Türkiye, Russian-controlled regions of Ukraine (Crimea, Donetsk, and Luhansk), United States, Venezuela, Virgin Islands US, Yemen, Zimbabwe.